After the Uh-oh post I changed the oil on the bus a few times, looking for any more traces of the internal engine damage. None were found. That's the good.
I was motivated to have a back-up-plan on tap and thus picked up a zero mile 2L rebuild which I plan on cleaning up and finessing so it's a perfect turn-key bolt in replacement. That's the better.
The Not-Ugly-Anymore refers to the bus, which I worked on over the last weeks without taking pictures. The work included proper bare-metal patching and repairing to both front doglegs and behind the driver's rear wheel, blend painting of these areas with our touch up paint gun, and a hand-touch-up of the nose area.
I also installed a small Midland CB radio and a gutter mount antenna....
Oh, and I adjusted the valves.
Oh, and I changed the plugs.
So (hopefully) ends the work on the bus for 2007... Except I changed the oil again today, and the filter. Oh, and the rear brakes need adjusting before the trip.. I'd better stop typing before I rebuild the whole damn thing!
Sunday, September 23, 2007
Saturday, September 8, 2007
Uh-oh...
These are things you don't want to find when you change your oil... I did. Well, not the quarter, but the rest! No sense rehashing old news. Check this out for the whole story: http://www.thesamba.com/vw/forum/viewtopic.php?t=252605


Bumper Refinishing & Sage Green Touch-Ups Pt. 1
No befores, just afters this time... Front and rear bumpers stripped, welded, filled and painted gloss white. Rust bubbles removed, filled, and blown in with Nason Ful-Cryl...


Sunday, August 19, 2007
Bob's Bug Resto - SHE'S OVER!!!!!!!!!!!!!!!!!!!!!!!!!!!!!!!!!!!!!!!!!!!!!!!!
Here are some pictures from the final assembly of Bob's Bug. On Friday night and Saturday I finished my part of the resto, with lots of help from Vanessa. During this time I completed the assembly of the doors (all the finicky window rubber and glass), completed the wiring under the hood, installed the AM/FM/CD/MP3 deck, installed and wired all of the lights, refurbished and installed the speedometer, mounted the front hood, latching system, and seal, installed the carpet and seats, mounted the shift knob, then finished things off by installing the emblem on the hood. Next I gassed it up and took off for a spin! A YouTube video will follow the pictures showing the startup and first drive.
 The finished interior.
 The taillights, prior to bumper installation.
 Headlight and custom front signal.
  The final touch.
 Look mom, no hands!
 A little go-go juice.
 All Done!
 The finished interior.
 The taillights, prior to bumper installation.
 Headlight and custom front signal. The final touch.Look mom, no hands!
 A little go-go juice.
 All Done!
Or was it.... Vanessa and I detailed the car (and our bus) and took it for a drive to the Ajax Cruise Night at CTC with no problems, however I soon realized the wiper motor I had installed was a 6V unit and wasn't parking in the right location. After a bit of swearing I found the correct 2 speed 12V motor in great condition in my 6V motor stash!! I guess I should have paid a little more attention. Woe is me, though, as the motor wasn't correct, it was from a Ghia with a longer shaft and the wrong park location. At midnight Saturday I pulled the motor apart, re-indexed the parking mechanism, shortened the drive lever, installed a new pin system, reassembled and reinstalled. Now it works like a charm!
The car was finally ready for hand-off to Bob with a short to-do list to perfect it. Bob and Dianne arrived promply Sunday morning at 8:30 and we were off to BugFest (http://www.bugfest.ca/). See the main blog here for details: http://ad-libs-main.blogspot.com/
The car was finally ready for hand-off to Bob with a short to-do list to perfect it. Bob and Dianne arrived promply Sunday morning at 8:30 and we were off to BugFest (http://www.bugfest.ca/). See the main blog here for details: http://ad-libs-main.blogspot.com/
So, do I have any final thoughts? Sure. In the end the trials, tribulations, bloodied knuckles and late nights are worth it. This is the first resto I've actually seen from start to end. It was nice to make mistakes with someone elses car (and money). If I could do it over again I would have waited for a more complete car to come along, like the '65 we have waiting in the wings. Working from a rotten shell meant we were "nickel and dimed to death" in the final assembly stages. On the other hand it was neat to save some more German iron from the scrap heap. I will also spend a little more time on future builds working with the hood, decklid, and door alignment prior to paint. If you had asked me at any time, "would you do it over again" as I locked up the garage after a hot night of welding or body filler sanding, the answer probably would have been "no." But, alas, seeing the car complete makes it worth the pain.
Wednesday, August 15, 2007
All the King's Horses and All the King's Men Trying to Put it Together Again...
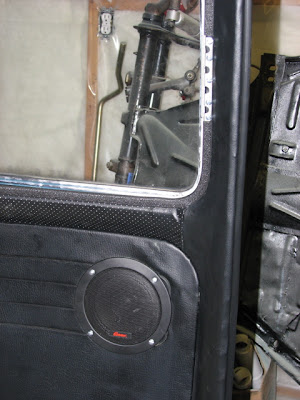
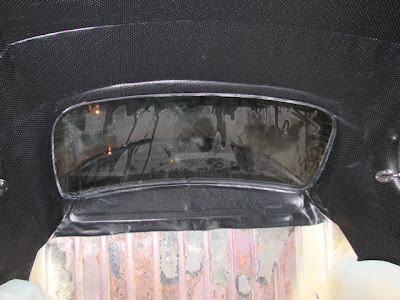
With some assistance from Bob on the weekend and Vanessa last night, the bug is starting to come together. The headliner is in. The front, rear, and pop-out windows are in. The taillight housings are installed. The decklid is installed. The doors are on the body. The gas tank is in and hooked up. The wiring has been started. Still to come the rubber and glass needs to be installed in both doors, the wiring needs to be completed, the carpet and interior needs to be installed, the lights connected, bumpers bolted up, etc.




Monday, August 13, 2007
I'm Blue, Da-ba-de-da-ba-di....
The day finally arrived last week to blow on the paint. After the final sanding of the primer with 320 grit paper I cleaned the vehicle with a grease and wax remover, then used a tack cloth to remove any lint or remaining dust (more on that later). The Nason Ful-Cryl was mixed 8 - 2 -1 (paint - reducer - activator). I applied the first coat too thickly and wound up with a few runs, but it covered well and looked pretty good right away. I did notice that I hadn't got all the lint, however. I decided to let it dry overnight then attack it in the morning by wet-sanding and re-spraying.
Here's a video of the first coat going on:
Here are some pics of the wetsanding the next morning:


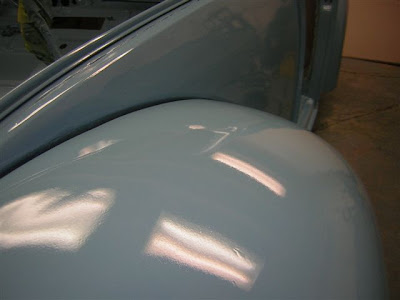
These pictures were taken once the second and final coat was applied. This time I didn't get any runs but did get a little orange peel here and there. It should buff out down the line, but for now I am very happy with it!!


Here's a video of the first coat going on:
Here are some pics of the wetsanding the next morning:


These pictures were taken once the second and final coat was applied. This time I didn't get any runs but did get a little orange peel here and there. It should buff out down the line, but for now I am very happy with it!!


Friday, August 3, 2007
A Primer Course....
Here are some pictures of the progress on Bob's bug... The first group show the condition of the car / filler just prior to cleaning everything with metal prep:


 Once everything was cleaned and hung I mixed up a batch of epoxy primer. This product went on very nicely with the gun set to about 60psi with the trigger pulled. It was a bear to clean it out of the gun, however.


 With a door and a half to go I ran out of the epoxy primer. It was obvious that the car needs a bit more finessing so I opted for some high build primer surfacer to cover everything. Unfortunately the vendor told me I didn't need to thin the product so my first attempts were rather futile. Even after thinning it slightly it didn't lay down smoothly, but after researching I learned that's because I have a 1.4mm tip on my gun. A 1.8 or larger is preferred for this product. Regardless, it did cover very well and it filled many imperfections. Everything needs to be sanded now, then another coat (with a larger tip!) and more sanding, then it's time for colour...


 Here's a hint of things to come.....


 Once everything was cleaned and hung I mixed up a batch of epoxy primer. This product went on very nicely with the gun set to about 60psi with the trigger pulled. It was a bear to clean it out of the gun, however.


 With a door and a half to go I ran out of the epoxy primer. It was obvious that the car needs a bit more finessing so I opted for some high build primer surfacer to cover everything. Unfortunately the vendor told me I didn't need to thin the product so my first attempts were rather futile. Even after thinning it slightly it didn't lay down smoothly, but after researching I learned that's because I have a 1.4mm tip on my gun. A 1.8 or larger is preferred for this product. Regardless, it did cover very well and it filled many imperfections. Everything needs to be sanded now, then another coat (with a larger tip!) and more sanding, then it's time for colour...


 Here's a hint of things to come.....
Subscribe to:
Posts (Atom)