So, now I'm ready to finish what I started, only I'm much wiser now. I figured out that the engine was hanging 2 - 3 inches low in the rear due to bent frame horns. So, the decision was made to pull the engine and install a Kafer Cup Bar to straighten the horns. It's also an opportune time to fix the butchered exhaust stud area on the front (front is front) of the engine. I confess this was mostly my doing when I replaced the muffler a few years back. Not knowing what I was doing I broke both lower front (front is front) studs. I tried an extractor and broke it off in one of the studs. In the other I broke of a tap. Both the extractor and the tap are hardened steel. I wound up drilling, hacking, and butchering until I could (barely) get new studs in place, which I held there with JB Weld epoxy... It actually held up admirably.
Anyway, once I pulled the engine and got it up on my work surface I realized I was in more trouble than I remembered... It looked like I would almost certainly need to get new heads, which would take more bread than I have at this time. As a last ditch effort with nothing to lose, I decided to equip my Mig Welder for aluminum welding in an attempt to build the area up with weld, then drill and tap new holes for the studs.
Here's the step by step procedure:
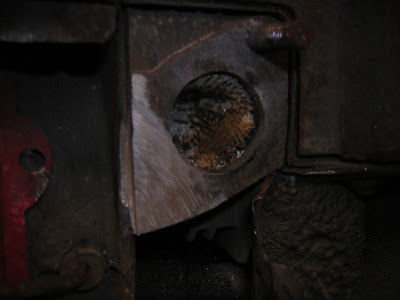
 This shot shows one of the mangled and oversize stud holes.
 Here I am pre-heating the area with a small MAPP-OXYGEN torch. Aluminum dissipates heat very quickly and thus, a small welder like mine will get much better penetration if the area is pre-heated to 250 degrees or more...
 OK, I know it looks ugly, but fact is this is the pretty side - my second attempt - based on lessons learned on the other side. On my small welder I needed the amperage and wire feed both set to maximum in order to get penetration. Though this looks like one large blob, it's actually five or six separate welds with oxidation removal in between with a wire brush on a drill. I tried to get penetration all the way around the surface area of the mangled cylinder head.
 Here's the same ugly blob, ground down to the original shape.
 Here I've fit an old gasket on the remaining stud to locate for the new hole. I centre-punched the aluminum and drilled with a 17/64 bit. I take it as a good sign that I totally dulled two titanium bits doing this - the weld must be stronger than I expected!
 Here I am tapping the new holes with an 8mm x 1.25 tap.

And finally, here's the finished product, ready for new studs!!
So, final analysis was it was more than worth it to go through this process. Time will tell how strong the repair is. However, doing it this way saved me taking a strong-running engine apart. It also saved all the associated costs of new heads, pushrod tubes and seals, etc. Total cost for this repair was $20 in MAPP and Oxygen tanks, $10 in aluminum welding wire and $60 for the Argon shielding gas. However, the guy at Praxair will likely let me trade the gently used cylinder for the AutoWeld gas I normally use, so this may prove to be cheaper than I thought.